Pages

Showing posts with label Pinterest. Show all posts

Monday, May 4, 2015

Oil bandwagon

I jumped on the bandwagon. I kept seeing information about essential oils. I know a few people that use them for several health issues. I am very blessed and do not have any major health concerns, but I was reading how beneficial essential oils can be. I was mainly interested in the air purification aspect that some of the oils and blends can provide. Plus, since living in California I have experienced seasonal allergies and wanted something non-chemical to help alleviate that annoyance.

I know someone who sells Young Living oils and was ready to make a purchase from her. Then I decided to do some research. I don't think there is anything wrong with Young Living oils, but I decided to try a different company--Native American Nutritionals. I liked what I was reading about their company and their farming practices.

In my first order I purchased 3 oils/blends:
Purify
Peppermint
Citrus Blend

I also ordered an oil diffuser on Amazon. You use a few drops of oil in water and it diffuses all night. 

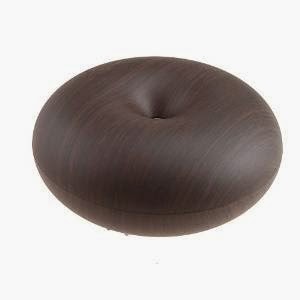
I am very happy with the oils so far. They freshen the air naturally. I can tell a difference in the air quality of our bedroom after having it closed up all night. I have also been seeing less spiders on my lawn chairs. To achieve the last part, I mixed a few drops of peppermint oil in water and sprayed on my lawn chairs. We have been seeing a ton of spider webs on those things and I felt like I couldn't sit on them without worrying that a black widow was going to come out and crawl all over me. Creepy! Time will tell if it really works. Last summer we saw a lot more spiders towards the end of the season. But the peppermint smells so amazing and sweet anyway. It's wonderful in the diffuser, too!

Now that I have joined the oil movement, I keep seeing tons of ways to use essential oils on Pinterest. You can make cleaning solutions with it. You can make shampoo. You can make bug spray. You can add some to your laundry. The options seem endless.

My next experiment will be with the Bug Off blend. We live near rice fields and get a ton of mosquitoes. The Bug Off blend can be mixed with water and sprayed onto the skin and is supposed to act as a natural bug spray. I also ordered Lavender. It will be a nice scent to diffuse at night and mix with my other oils.

Saturday, December 27, 2014

We eat well on Christmas

This Christmas was a simple one for us. It was only Charles and me. But I loved it! We each got some pretty amazing presents (even though that doesn't matter at all) and we enjoyed watching the kitties play with their Christmas gifts.

I did not put a whole lot of thought into Christmas dinner, but I did find some amazing recipes of new dishes to try (Pinterest, of course).

Our Christmas breakfast tradition is Chocolate French Toast. I have shared this on the blog before. It is such a yummy breakfast that I should make it more often. We made homemade Oatmeal Bread in the bread machine to use. It was a great choice.

Our dinner included smoked chicken. Charles did a great job with that! As our sides we enjoyed Sweet Potato Casserole, Garlic Pecan Broccoli and homemade Hawaiian rolls. Everything turned out delicious! The sweet potato casserole has a fantastic crunchy topping. The recipes makes a lot, so we have been enjoying this everyday since Christmas. The Hawaiian rolls were good...because what homemade bread isn't good, right? But I don't know if it really tasted like Hawaiian rolls. I might try another recipe to compare.


Normally, we have birthday cake for Jesus as our dessert on Christmas. This year Jesus wanted bread pudding. I found an amazing recipe for New Orleans style bread pudding with a coconut praline sauce. SOOOOO good! We also used homemade Oatmeal bread for this recipe.

Monday, October 13, 2014

Mummy Pumpkin

We finally made time to carve our pumpkin from Bishop's Pumpkin Farm. After looking through several designs on Pinterest, we went with a mummy!


It was hard to get them both to look at the camera at the same time.

Sunday, August 31, 2014

S'Mores Brownie Bars

If you follow me on Pinterest you know that I have a board totally dedicated to S'mores. I do not love s'mores more than the average person, but I think it would make a fantastic little bakery/shop. Just think how much fun it would be to visit a place dedicated to s'mores. You could roast marshmallows and make your own s'mores in the shop or enjoy many s'mores inspired goodies. I have a ton of great ideas for this s'mores shop. Maybe one day I'll find someone who compliments me in the business sense and will open one together.

In the meantime, I can experiment in my own kitchen.

Last week I made some yummy s'mores brownie bars based on this recipe from Erica's Sweet Tooth. I just made a slight alteration. The first alteration was that I used my own gooey brownie recipe (halved). The second alteration was instead of using a peanut butter swirl, we baked Take 5 bars into the brownie.

They were really yummy, but I did not take a picture. We just gobbled them up! I enjoyed the graham cracker layer on the bottom. The marshmallows on top were gooey and yummy. These are definitely a good take on a s'mores for when you're not near a campfire.

Wednesday, May 21, 2014

Hummingbirds galore!

A few months ago we were picking up some bird food at Lowe's and saw all the hummingbird feeders. We thought we would take a chance, buy one, and see if we could attract a hummingbird or two.

Apparently the hummingbirds here are numerous and very hungry! We go through hummingbird food like crazy. When we purchased the feeder we also bought some nectar. But after seeing how fast they drink it up, I looked into making my own. It couldn't be any easier. Thank you Pinterest! All you do is heat up some water and sugar until the sugar is combined...one cup of water with 1/4 cup sugar.

A few times at the new house we have seen 6+ hummingbirds buzzing around the feeder at the same time. They are really fun to watch. Hummingbirds are very territorial and will fight in mid-air. We are always worried about being smacked in the face by one whenever we are outside.


Monday, February 17, 2014

Cream Cheese Pound Cake

Can I just say yum, yum, yum! For our Valentine's Day dessert we planned to have fondue. One of my favorite fondue dippers is pound cake. Yes, it is a LOT easier just to buy a loaf of pound cake at the store. But if you've been following my blog you probably understand why I would have an issue with that. Who knows what is in store bought pound cake? I would rather make it myself. I am SO glad that I did. This recipe makes a delicious pound cake. Beside eating it with fondue, we have enjoyed it with ice cream and with homemade caramel sauce. It has been delicious every way.


The recipe was found on Pinterest and is featured on the blog This IS How I Cook.

Ingredients
3 sticks butter, room temp
1 8oz package of cream cheese, at room temp
3 cups sugar
pinch of salt
2 teaspoons vanilla
6 large eggs, at room temp
3 cups flour, at room temp ;)

Grease and flour (or just grease if you're lazy like me) 2 8x4 loaf pans or one 10" tube pan. I used a bundt pan. Preheat oven to 325 degrees.

Cream butter, cheese and sugar until light and fluffy. Add salt and vanilla, beating well. Add eggs one at a time, beating after each addition. Gradually beat in flour on low speed. Spoon mixture into pan(s). Make sure not to overfill your pan(s).

Bake about 1 1/2 hours or until a skewer comes out clean.


Thursday, January 30, 2014

Finally finished!

Way back in February (almost a year ago...wow!), I set out some goals to accomplish while Charles was off at training (The Long Morrow). I did not accomplish as much as I wanted to, but I am happy to report that I finally finished one of those projects...my t-shirt blanket!

The front features t-shirts from college, including some of my Alpha Omega shirts. Each of those shirts reminds me of a specific time and place in my life. I love having those memories!

The back features some of Charles' shirts that he was willing to part with. He has a very large t-shirt collection. And I mean literally a whole dresser full of t-shirts. Originally the back was going to be polka dot fabric in various colors. Now I have to figure out what to do with that fabric.


I am happy with my t-shirt blanket, but I probably did it all wrong according to experienced blanket/quilt makers. With that said, if you have a desire to make your own just do it! You can find lots of tutorials on Pinterest. My friend, Jenilyn, over at Grits and Giggles also has a quilt tutorial she posted recently.


Tuesday, January 28, 2014

Bread Machine: White bread

Charles has become a fan of bread pudding. We have had it a couple times recently at restaurants. There are so many different kinds! I decided to try my hand at it, but first I had to make the bread with our handy dandy bread machine! I kept it simple and made regular white bread.

The first time we attempted the bread we were not paying attention to it and it needed more water. By the time we realized this it was too late to add any more. The bread came out looking pretty funny. Charles still ate the soft, white middle.

The second time I made it I was more vigilant and everything came out great!


I followed a Pinterest recipe, but it was not too different from the recipe in my bread machine's manual. Here is a link to the one I used: Easy Bread Machine White Bread

Ingredients
1 cup warm milk (microwave about 1 minute)
3 cups bread flour
1 teaspoon salt
2 teaspoons yeast
2 Tablespoons butter, cut into 4 pieces
(you may need to add extra water. I added about 1 1/2 Tablespoons)

Add ingredients in the order listed. Make a well in the middle to add yeast. Tuck the butter pieces into the 4 corners.

Set for basic/white cycle, Medium crust, and 1.5 lb loaf.


Monday, January 27, 2014

Easy Cannolis

I love Italian food! Charles and I were just discussing this over chicken parm and Gorgonzola risotto on Saturday. (We found what is to be my favorite Italian place in town). It always surprises me when people say they do not care for Italian food. Who does not love pasta, cheese and tomato sauce? I know there is a lot more to it than that, but so much of Italian food is some variation on those three things.

One of the best Italian desserts is cannolis. I have never attempted to make real homemade cannolis. I think my aunts on my Dad's side do. It would just be too much work, although probably well worth it. I saw a recipe on Pinterest (of course) for mini cannoli cups and it looked pretty easy so I gave it a shot.


They turned out to be just as easy as they looked and quite yummy. Visit Cooking with Sugar's blog for the directions: Mini Cannoli Cups. Here is the recipe again.

Ingredients
For cups
1 refrigerated pie crust (if you're smart you'll use Immaculate Bakery or Trader Joe's and not Pilsbury)
3 Tablespoons Turbinado sugar (I just used regular sugar because I didn't want to buy one more thing)
1 teaspoon cinnamon

For filling
1 15oz container of ricotta cheese
1/2 cup powdered sugar
2 Tablespoons white sugar
1 teaspoon vanilla
mini chocolate chips or whatever else you want to sprinkle on top

To summarize the steps, you roll out the pie dough and sprinkle the cinnamon and sugar on top. Roll it in. Cut out circles and put into a mini cupcake tin. Bake. Then you mix the filling ingredients, except for chocolate chips. Pipe into cups and enjoy. For her steps, check out her blog. The end result is a simple and delicious Italian dessert!


Monday, January 13, 2014

Bread Machine: Honey Wheat

We recently acquired a bread maker. Working with yeast doughs has always intimidated me, but we loved the idea of homemade bread. A bread maker was the solution!

Our first attempt came out pretty good, in flavor. It was not perfect, though. The recipe gave the option of a 1 or a 1.5 lb loaf. Since it was our first bread, we went with the 1 lb. After putting all the ingredients in, we realized our bread maker only allows for 1.5 or 2 lb loaves. Instead of wasting all the ingredients, we selected 1.5 lb to see what would happen. Our bread collapsed in the middle, but still tasted fine.

I used this recipe from Cooking Nook.


Calvin loves bread!


Wednesday, January 8, 2014

DIY Button Necklace

If you did not know already, I love buttons! I cannot quite explain it, but I love looking at all the different kinds and colors. I have some in jars sitting on my coffee table right now. I even received a bag of buttons for Christmas and was thrilled!

I saw this necklace on Etsy and fell in love. I was very close to buying it several times. Then I turned to Pinterest for a tutorial and found a great one. Why buy when you can DIY?

The Littlest Big Spoon Etsy store
Here is what you'll need to make your very own button necklace:
- Buttons (of course)
- Necklace closure. I went with the toggle variety.
- String, wire or yarn. I used quilting thread. (If I make another one I might go with a thicker string.)
- This tutorial


Wednesday, October 9, 2013

They will love you...

...if you make this cake! Over the weekend, I made Banana-Chocolate Chip Cupcakes with Peanut Butter frosting. I brought them into work on Monday and Tuesday and everyone cannot stop raving about them. I thought I would share!

The recipe is from Bon Appetit!

Ingredients
Cake:
3 cups flour
2 teaspoons baking soda
2 teaspoon kosher salt
1 1/2 cups sugar
1 cup unsalted butter, room temperature
1/2 cup packed brown sugar
3 large eggs
1 1/2 teaspoons vanilla extract
2 cups mashed very ripe bananas (I used 3 bananas)
1 cup sour cream
1 10-oz. bag mini chocolate chips (I just had regular chocolate chips)

Frosting:  
2 cups peanut butter (I used crunchy)
1 1/2 cups powdered sugar
1 cup unsalted butter, room temperature
2 1/2 teaspoons vanilla extract

Cake
Preheat oven to 350 degrees. Whisk flour, baking soda, and salt in a medium bowl. Using an electric mixer, beat sugar, butter, and brown sugar in a large bowl until light and fluffy, about 3 minutes. Add eggs one at a time, beating to blend between additions and occasionally scraping down sides and bottom of bowl. Beat in vanilla.

Add dry ingredients; beat on low speed just to blend. Add bananas and sour cream; beat just to blend. Fold in chocolate chips. Divide batter evenly among pans; smooth tops.

I made as cupcakes, but the recipe instructions are for 8x8 cakes. Bake cakes until a tester inserted into the center comes out clean (about 22 minutes for cupcakes or about 35 minutes for cakes). Let cool completely.

Frosting
Using an electric mixer, beat ingredients in a medium bowl until a light and fluffy frosting forms, 2–3 minutes. Spread on cupcakes. My frosting was a little runny, but after sitting in the fridge it stiffened up and was perfect.


Monday, January 28, 2013

Potato Wedge Nachos

On Sundays, Charles and I typically do low-effort dinners. We lean towards homemade popcorn and nachos. This weekend we mixed it up a little with Potato Wedge Nachos. I adapted the recipe from this pin: Cheesy Potato Fries.

Photo borrowed from blog: Oh So Delicioso

Ingredients:
Potatoes cut into wedges--I used a bag of baby sized potatoes
1/4 cup olive oil
Salt and pepper, to taste
Garlic powder, to taste
Paprika, to taste
Chedder cheese
Mozzarella cheese
Sour Cream
Salsa

Directions:
Preheat oven to 400 degrees. Wash potatoes and cut into wedges. With the baby potatoes, it was hard to get similar sized wedges since some potatoes were really tiny and others were larger. It didn't really matter. Some were a little more done than others. Place on baking sheet or in baking dish.

Pour on olive oil. Sprinkle with salt, pepper, garlic powder and paprika. Toss potatoes.

Bake potatoes for 40 minutes.

When finished baking, remove from oven. Plate up and sprinkle with cheeses. Garnish with sour cream and salsa. Enjoy!

Monday, November 26, 2012

Christmas Pillow Project

I have serious intentions of making Christmas pillow cases for my couch pillows. They need a little seasonal change. The design came to me out of the blue and then I found an example picture on Pinterest to guide me. I'm very excited.
Guide

I started off looking at Hobby Lobby for fabric...nothing cute. Then I went to Joann Fabrics...only one cute fabric, but I want to do a patchwork.

I finally looked on Etsy and found a myriad of super cute options. I narrowed it down the ones below. Most of them are from Riley Blake... I don't really know much about that brand except that they have very adorable options. Now I have to wait for them to arrive and then I can start sewing. I'm very excited!
I love the polar bears, penguins and Eskimo-like kids on this one.


Wednesday, October 24, 2012

Chocolate Pecan Pies

I was in the mood for some pecan pie the other week. I checked Pinterest for a good recipe and came across one from Paula Deen. I figured a full-figured Southern lady like herself would make a pretty good pecan pie. And even better it was for Chocolate pecan pie.

So I made it... I have issues either with my oven or my pie pan. My pies usually come out runny. I should have remembered this and lowered the amount of corn syrup and should have baked it longer. But I didn't. The pie tasted good. It was just really runny.

Here's a link to her recipe.

This week I tried a different recipe. I used my good ol' Betty Crocker Big Red cookbook. Their recipe is for traditional pecan pie, but I added some chocolate chips to mimick the Paula Deen recipe. I reduced the corn syrup a little and turned the oven up 5 more degrees. It came out a little more brown than I was going for, but it tastes very good. The pecans, because they were mixed into the syrup/sugar mixture, have a nice crunch on them--similar to the Nutty Bavarian nuts. Yum! I think I'll stick with this recipe from here on out.

Betty Crocker Pecan Pie Recipe

one crust (if you're a follower, you know I used Immaculate Baking crust)
2/3 cup sugar
1/3 cup butter, melted
1 cup corn syrup
1/2 teaspoon salt
3 large eggs
1 cup pecan halves or broken pieces
1/2 to 1 cup chocolate chips (optional)

Heat oven to 375 degrees. Line pie pan with crust

Beat sugar, butter, corn syrup, salt and eggs in bowl with wire whisk or hand beater until well blended. Stir in pecans and chocolate chips. Pour into pie pan.

Bake 40-50 minutes or until center is set.

While reading further down on the page, you can make it "Kentucky" style by adding 2 Tablespoons bourbon and 1 bag chocolate chips.

Monday, September 24, 2012

Fudge-making virgin no more!

I have officially delved into the world of fudge-making. I have always avoided it because I thought it would be difficult. I found a recipe on Pinterest for Chocolate Cinnamon Fudge from a like-minded blogger. She was nervous about making fudge, too, but realized it's a lot easier than you would like.

Here's the recipe:
1 14oz can sweetened condensed milk
2 teaspoons ground cinnamon (if you like cinnamon, but don't want a huge cinnamon taste, I would go with 1 t. Or you can leave it out completely)
1 teaspoon vanilla extract
1 lb (about 2 cups) semi-sweet chocolate chips
3 Tablespoons butter, cut into 1/2 inch pieces, at room temp

Butter an 8x8 dish. Line with parchment paper (or don't and be like me...although this makes it more difficult to get the fudge out)

In a glass or stainless steel bowl, combine sweetened condensed milk, cinnamon and vanilla extract.  Stir to combine. Stir in chocolate chips and butter. Put the bowl over a saucepan of barely simmering water and stir until chocolate is melted and there is a smooth consistency. This can take about 6-8 minutes. You can add nuts at this point, if you like nutty fudge. Pour mixture into baking dish and spread evenly. Refrigerate for at least 2 hours.

Cut into pieces and enjoy!

Monday, March 26, 2012

Bananas Foster French Toast

Once, back in college, my school cafeteria had some culinary students making things. One station had bananas foster. It was so delicious! Charles and I made it once since then, but we didn't get it quite right. For some reason lately I've been thinking about making it again. We finally bought some Rum and had a bunch of bananas, so I was going to make some for dessert, but then I remembered that we did not have any vanilla ice cream to enjoy it with.

The next morning, I wondered if there was a recipe for Bananas Foster French Toast. Thanks to Pinterest (yes, I'm obsessed just like everyone else), I found a great recipe! I was going to take a picture of my delicious breakfast, but the camera battery was dead. But it was definitely worth sharing. Here's the picture from Pinterest and a link to the recipe.


Source: I added a tablespoon or so of rum in mine. Yes, it was for breakfast, but the alcohol cooks out. And it's not bananas foster without it.

Tuesday, March 13, 2012

Some darn cute curtains!

Since joining Pinterest I've been pinning away. I pinned some really cute curtains that I wanted to try in my kitchen. I've been looking and looking for curtains in there, but I haven't been able to find anything worth buying. I had a bunch of left over red and white polka dot fabric when I made a curtain to go over the windows in the back door, so I knew I had to use that.

Here's the image I pinned:
Source--really easy! They could probably be done basically no sew if you aren't handy with a sewing machine

And here's my final product:

Thursday, January 5, 2012

Garlic Knots

As part of my Christmas dinner, I made Garlic Knots. I found the recipe on a blog; I honestly do not remember which one, though. There was an Italian restaurant called Italiano's that we frequented often when we lived in Texas. They served the best garlic knots. These were pretty good, too!


Garlic Knots

Ingredients:
40 mini refrigerated buttermilk biscuits or 20 regular refrigerated buttermilk biscuits
1/2 cup canola oil
6 Tablespoons grated Parmesan cheese, plus more for sprinkling after baked
3 teaspoons garlic powder
3 teaspoons dried oregano
3 teaspoons dried parsley flakes

Directions:
Preheat oven to 400 degrees. Open the canned biscuits. On a dry work surface or cutting board, take 1 biscuit at a time and roll each biscuit into a long rope. Gently tie the biscuit rope into a knot and tuck the ends under. Place two inches apart on a greased baking sheet.

Bake for 10 to 12 minutes or until golden brown. Once baked, remove the knots from the oven. Place them on a wire rack with a paper towel under them to catch the excess oil.

In a bowl, combine the canola oil and seasonings. Brush the knots with the oil and garlic mixture while they are still hot. Sprinkle with more Parmesan cheese.

Tuesday, October 11, 2011

Oatmeal Pie

I have finally made the Oatmeal Pie! I've been talking about making this pie since our visit to Amish country last month. I did a simple search on Google for a recipe and came across one that claims to be from Charleston during the Civil War era. As most people know, pecan pie is a very popular pie, especially in the South. But according to this person, pecans were hard to come by during the Civil War so people substituted oatmeal. I did make one tiny adaptation to the recipe and added chocolate chips. I love anything chocolate and thought it would be good in this pie. This pie tasted so yummy and you feel slightly less guilty eating it because of the oatmeal.


Ingredients:
one pie crust
4 eggs
1 cup granulated sugar
2 Tablespoons flour
1/4 teaspoon salt
1 cup light corn syrup
1/4 cup melted butter
1 teaspoon vanilla
1 cup quick-cooking oatmeal (uncooked)
1 cup chocolate chip

Directions:
Preheat oven to 350 degrees.

Beat eggs until frothy.

Combine sugar, flour and salt in small bowl. (If not using chocolate chips, you can add 1 teaspoon ground cinnamon at this point). Add eggs; mix well. Add corn syrup, melted butter and vanilla. Mix in oatmeal and chocolate chips. Pour into uncooked shell and bake for 45 minutes.