Pages

Showing posts with label Decorations. Show all posts

Sunday, November 23, 2014

It's beginning to look a lot like...

I used to tell people that my favorite holiday was Valentine's Day. I was lying to myself with that one. My favorite holiday is definitely Christmas. I love everything about it! I love decorating. I love the food. I love the meaning behind the holiday. I still get up before the sun comes out on Christmas morning because I am that excited to open presents.

At work, I have been taking care of the Christmas cards which has got me thinking about Christmas a little prematurely. In our house, we do not decorate until after Thanksgiving. Charles believes the decorations cannot come out until December 1st or later. Sometimes I can get away with a few days before, if I'm persuasive.

This Christmas we are in a new house, so I have to figure out where I will put the Christmas tree and how I will decorate. This is both the fun and challenging part of moving so often. It gives me the opportunity to spruce things up, but it also gives me more to think about.

I have been pinning some ideas that I might try out. I thought I would share some with you.

I think I have a ton of red polka dot ribbon. It has just been sitting in a box doing nothing. It might be a fun way to use it.

I mainly love the candy cane sign, but this image is full of color and light.

I have been meaning to make these for the past couple of years. I'm determined this year.

I am thinking on the new kitchen table to have trees like this as the centerpiece or along the middle of the table. We will see if I get around to making some.

I love the light swags. I don't think I have a good spot to do this, though.

I desperately want an old sled and skates to make this happen. Maybe I need to hit some thrift stores or antique stores. I know I have seen these items before.

Tuesday, December 3, 2013

Deck the halls

December has arrived so I have put out almost all my Christmas decorations! For inspiration, I like to look back on pictures from previous years to remind myself where I placed certain items. And sometimes I do something totally different.

I haven't taken any pictures yet and I don't have a Christmas tree. I'm not sure if I will get one or not because Charles is considering a trip home for Christmas instead of staying here. My favorite thing about decorating the tree is pulling out all the ornaments in remembrance of when we purchased them. Our travel tradition is to pick up an ornament from each place we visit. We don't always find a cute ornament, but we definitely try. With all the places we have traveled together, it can be easy to forget some places. The ornaments are a nice reminder.

One of my newer Christmas decorations is a big hit on Pinterest. It is pinned at least once a day. It makes me smile every time. You can check out the original post here: Christmas Decorating Complete. The verse is a good reminder of what Christmas is all about.


Sunday, December 2, 2012

Christmas Decorating Complete

We have finished our Christmas decorating! We picked out our tree and decorated it yesterday. I also finished my Christmas pillows and added something new on my "shelf-thing." Take a look...
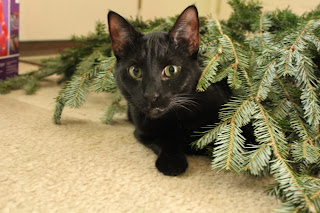
We had to trim a few branches off the bottom so our tree would fit in the stand. The kitties enjoyed crawling under them.


Unwrapping all the ornaments. It took some time.

Two of our new ornaments. Charles bought these in Iceland. Our travel tradition is to buy an ornament from each place we visit. We have quite a collection of unique ornaments. It is always a fun way to remember all the places we have been.


Love these German houses! I grew up with these--my mom had a collection that started when we lived in Germany. My brother-in-law gave each of these to me.


My new Christmas pillows! I love the fabric on the top most. It is so cute and whimsical.

My new additions---the frame in the back just has some red and white polka dot fabric inside. The frame in front has my own creation of a Christmas printable.

Close up of my printable. The verse is a good reminder of what Christmas is really about. 

Our Mexican nativity.


The tree with a new star

Eli! We got him in Georgia at an apple festival.

Wednesday, November 28, 2012

Christmas decorating has begun...

Usually I wait until December 1st to decorate for Christmas. This is a rule imposed by my dear husband who thinks it is too early to decorate before December arrives. This year, he has bent the rules. We are going to be out of town for Cheryl's wedding and for Christmas which gives us less days at home to enjoy the decorations.

Last night I set up most of the stuff I have. Every year I forget what I did the year before and have to recreate my displays. Surprisingly, the kitties haven't destroyed or knocked anything over yet. I was convinced that I would walk downstairs this morning and see at least one thing on the floor. I guess there is still time.

On Saturday we'll pick out a tree and finish up the decorating. Then I'll post pictures when everything is Christmas-y. Get ready!

Friday, September 23, 2011

Halloween Wreath--Tutorial

I've been seeing some super cute Halloween wreath tutorials around blog land. I just have a fall door thing and wanted to make something for Halloween. I got a fun idea and wanted to share it with all of. Since we have two black kitties and since black cats are one of those typical Halloween icons, I thought it would be fun to incorporate that onto a wreath.

Items you will need:
- wreath form (I used a green foam one from Michael's...I think it was 12 or 14 inches)
- one white foam sheet, purchased at Michael's
- one black glittery foam sheet, purchased at Michael's
- orange ribbon (I used one full roll and some from a 2nd roll of a 1 inch sized ribbon). Instead of ribbon, you could use yarn. Since I had done a yarn wrapped wreath a few months ago, my husband thought I should use ribbon for a different texture. I love his input!
- an extra piece of ribbon to hang your wreath from (I had a piece of black ribbon, so I used that. You could use some of your orange)
- hot glue gun and glue
- something to make whiskers (pipe cleaners, wire). I used paper clips. 

Wrap your wreath form with the ribbon. I overlapped the pieces a bit to make sure none of the wreath form showed through. I pinned the beginning to start and then used the piece of tape that was at the end of one roll to secure the end of that roll and the beginning of the next roll onto the wreath. Then I pinned the end. You could also glue the ribbon in place. At the time I wrapped my ribbon, I didn't have my glue gun warmed up.

Find an image of a cat that you want to use. I found this one online and sized it accordingly in Publisher. Print out the image of the cat to trace onto the glittery foam sheet. I cut out two cats since I have two black cats. If you are doing two cats, make sure to flip the image over to trace for the 2nd cat. Otherwise, you'll have two cats facing the same direction. Trace the cat image on the foam sheet and cut out. The glittery foam sheet wasn't as thick as the foam I used for the lettering, so I stabilized the cats with Popsicle sticks on the back. I didn't want them to get droopy.

Print out the word BEWARE (or another word of your choosing). Make sure it's a hefty font so it's easy to cut out of the foam. I used the font "Showcard Gothic." Cut the letters off the sheet so you can trace them. Trace the letters onto the white foam sheet. Cut out the letters with an exacto knife. I ended up having to trim the letters a bit because they were too fat.

Hot glue the letters and cats to the ribbon covered wreath.

Hot glue the ribbon loop on the back of the wreath so you have something to hang the wreath from.

If you want to include whiskers, you could use pipe cleaners or wire. I forgot to pick up some pipe cleaners, so I just used two paper clips. I unfolded the paper clips and straightened them out as much as possible. Then, with some wire cutters, I cut the two paper clips into 3 pieces each and hot glued the pieces onto the back of the cats face. They worked out great! I forgot to include the whiskers when I took pictures of the wreath, so that's why you can't see them. 

I LOVE the way this came out and I can't wait until October 1st to hang it on my door.


UndertheTableandDreaming


* This post was shared on the following Link Parties:

Thursday, September 22, 2011

Fall Banner/Bunting Tutorial

As promised, here is my tutorial for the Fall Banner/Bunting project. This project couldn't be any easier and could be used for any holiday or occasion.

Things you'll need:
- 4 sheets of scrapbook paper--12x12 sized
- Ribbon or twine or something to hang the triangles on
- mini clothespins
- buttons or other embellishments (stickers, etc)


I used my Silhouette machine to cut out a triangle to trace. You could eyeball it or trace a triangle that you happen to have on hand. I cut out 4 triangles from each sheet of paper. I only ended up using 3 of each color, but you could use more if your banner was longer.


Once you have the triangles cut out, you can embellish them. I used buttons from my expanding collection of buttons. I kept it simple. I thought about spelling Fall or Autumn with buttons, but after I laid it out, I wasn't feeling it. I did embellish one of the center triangles with a "T" in buttons for our last name. And I embellished the triangle next to it with a heart made out of my buttons. The heart came out kind of squished looking, but I'll call it folky. You could embellish with stickers or layer scrapbook paper triangles. Use your imagination.


I attached it to some white string I had lying around the house with some mini clothespins from my postcard display project. You could glue the triangles onto ribbon. I like being able to take the triangles off and change them around.

* This post was shared on the following Link Parties:

Tuesday, September 20, 2011

Fall Decorations and a Tutorial!

I absolutely LOVE fall! I love decorating for it, but I don't have a ton of fall decorations. I wanted to share with you some of the things I did and a tutorial for a fall leaves banner.

Pumpkins added to my everyday display on the bookshelf in the living room. I made that lantern back in the 7th grade. I'm very proud of it.
This is sitting on my coffee table. I love the two fabric pumpkins that I bought at Hobby Lobby last year. I added a mini pumpkin for the effect of three.
I made this banner/bunting (whatever this is called) using scrapbook paper. I originally had it hanging off the bar in the kitchen. Then I moved it to the stairs, but the kitties kept knocking it down, so I hung it from the wall in the living room. This is a really easy project to make for any season or party. I'll share a tutorial later this week.
The kitchen bar counter with metal pumpkins from our wedding. Usually I have pillar candles inside of them, but I don't have any at the moment, so I stuck a mini pumpkin in each. The center tray has my button collection. And the pumpkins each have two glass leaf-shaped tea light holders that were also at my wedding reception. It's really beautiful in the evening with candles lit in each. I have some faux leaves that I like to scatter on the counter with everything, but I know the kitties would absolutely love to play with those.
I love my cornucopia (also purchased at Hobby Lobby last year). I filled it with mini pumpkins. I love how the one in the front has a curly cue stem on it. I just need a yummy pie in the cake display and then this would be perfect!
This is my kitchen table display. I feel like it needs something else...maybe a table runner. A project for another day. The pumpkin was given to me by my little, Morganne, back in college. I have the faux leaves that were scattered down the aisle at my wedding inside for some color. It's fun to put candy inside for Halloween.
Here's my fall leaves banner. Super easy to make!
Tutorial for the 
Fall Leaves Banner
Things you'll need:
- scrapbook paper in fall colors. I used a bunch of paper in browns, oranges, reds. I used some patterned paper and some solid colored to give it an interesting look. I used a lot more paper than I was expecting. But it totally depends on how long or short your banner will be. 
- string/twine/ribbon. I looked for brown twine at Michael's, but for the life of me couldn't find any. So I just used some white string that I already had.
- hot glue gun and glue sticks

When I set out to do this project I had an image in my mind and wasn't sure how it would work out. My original idea came out looking pretty dumb, so I had to rework it.

Here's how to recreate my final project:
- cut out a bunch of leaves from your various pieces of scrapbook paper. I started off having my Silhouette do the cutting for me, but then the blade went dull or something, so I ended up cutting a lot of them out my hand. Very time consuming, but what else was I going to do. I used three different leaf shapes, but you could do more of a variety than that if you wanted to.

- Cut a piece of string/ribbon/twine to your desired length. I originally wanted to hang it from my staircase, so I measured that length with a little extra just in case.

- You can curl the leaves around a thick pen or wooden spoon to give them some dimension, if you want. I only thought of this because of my Silhouette. When I took them off the feeder sheet, they came off curled up and I liked the way it looked. It resembled real fallen leaves better. 

- Start gluing your leaves together in a line. You can see in the picture that mine is not a perfect line. Try to make it organic/natural looking---like they just happened to fall into place. Every so often, flip it over and glue the ribbon/string/twine to the back. Keep gluing until you've covered the whole length of your string.

- Hang and enjoy! Mine has hung a little funny, so I have to tuck it under the bar a little so it will hang upright better. I'm sure if I messed with it some I could fix that, but I haven't gotten there yet.

(In my picture, you can see some hole punches in some of the leaves...that's from my original idea where I hung them on the ribbon. When I did that, you couldn't see all the leaves and it looked really bad. I didn't feel like cutting out new leaves so I just made due with the hole punches).

* This post was shared on the following Link Parties: